CONSULTORIA
TESTE
DESENVOLVIMENTO
INVESTIGAÇÃO
Análise de materiais e falhas
Material degradation: Cracking, Corrosion, Stress Corrosion Cracking, Wear and more
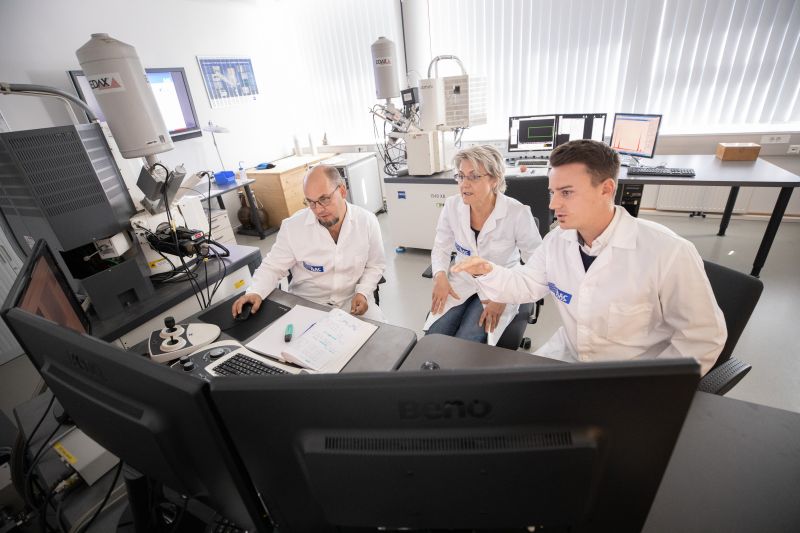
The team of microstructural characterisation possesses a profound knowledge and professional experience in the field of material development and optimization, failure analysis and quality control. We are working in close contact with ESA, the aerospace industry and corresponding research institutes on a huge variety of metals and alloys like, in particular, steels, Al- and Ti-alloys, composites, coatings and electronic materials. A significant part of our work has been devoted to failure analysis which requires mechanical-, corrosion- or tribological phenomena to be understood and correlated with production processes and application environments. Our motivated team works constantly on widening the preparation and analysis methods in order to be able to resolve even the most challenging failures and damage cases.
Failure analysis is used to determine the causes of component failures. Various analytical techniques are employed to investigate the damage and to identify the primary cause, which often leads to further damages that are merely consequential. Only by identifying this so-called root cause remedial measures can be derived. Thus, our approach at AAC is not only to image the failure but also to provide inputs for a possible optimisation of materials and components.
As an independent laboratory, we provide comprehensive failure analysis to our customers as a service. Failure analysis may include the following:
- Analysis of broken parts and components
- Assessment of cracks
- Quantitative measurement of wear rates
- Assessment of corrosion
- Interpretation of deposits on functional surfaces
- Detection of inclusions and defects that may influence mechanical properties…
Why failure analysis?
The purpose of a failure analysis is the systematic in-depth identification of the causes of component failures. The goal is to understand the root-cause damage to take appropriate measures for remediation and future prevention. Component failures typically lead to economic losses (production downtime, consequential damages, recalls, etc.) and possibly endangers human health. Clarifying technical damages and their causes is a crucial prerequisite for damage prevention. Thus, damage analysis is an indispensable part of learning from failures.
When considering failure analysis, the following points must be taken into account:
- Root Cause Identification: Failure analysis helps identify the underlying causes of damage. This enables targeted treatment of the primary cause of the problem.
- Prevention of Consequential Failures: Early detection and correction of damages often prevents further damages.
- Derivation of Remedial Measures: Based on the findings of a failure analysis, measures can be derived to prevent future damages.
- Improvement of processes, materials, and components: By analysing damages, weaknesses in processes or components can be identified and the compatibility of materials is assessed. This allows corrective measures and the that will improve efficiency and reliability of processes and components.
What can AAC offer?
- Comprehensive failure analysis: Our systematic failure analyses do not stop at examining superficial damages. We perform in-depth investigations to determine the underlying causes.
- Expert expertise: Our experienced team of experts employs various analytical methods to investigate a wide range of different failure cases.
- Informative report: Our customers receive a comprehensive report with interpretations and conclusions from which action plans can be derived.
- Customer-oriented approach: Each assignment is individual, and therefore our analyses are tailored to the specific customer requirements.
Methods of Failure Analysis offered by AAC
- Microscopia de luz
Com a ajuda de vários microscópios de luz modernos (microscopia estéreo e de luz reflectida), as estruturas de superfície podem ser visualizadas em pormenor. Estas incluem, entre outras coisas, a análise de superfícies de fratura, exames metalográficos, medição de espessuras de camadas em secções transversais e muito mais.
- Surface Analysis:
Surfaces are investigated using optical methods to determine the roughness, waviness and flatness of a surface. On the one hand, certain structures (e.g. peaks, valleys, grooves, pores, particle adhesions, etc.) can be measured and, on the other hand, the surface can be quantitatively characterized (determination of Ra, Rz and other statistical surface characteristics). The quantitative parameters are determined from 2D profile measurements and 3D surface measurements.
As an alternative to using purely optical methods, it is also possible to generate a digital surface model from SEM images using complex software programs and to derive the above-mentioned surface parameters from this model. This enables the assessment of waviness and roughness as well as the measurement of structures even on surfaces that are not accessible to optical inspection (e.g. measurement of microscopic features on a surface).
- Microscopia eletrónica:
Os exames de imagem de alta resolução de amostras de materiais e componentes são realizados utilizando a microscopia eletrónica de varrimento (SEM). A utilização de diferentes detectores fornece diferentes informações sobre a estrutura da superfície a ser examinada: a topografia pode ser melhor visualizada com electrões secundários (detetor SE), enquanto os electrões retrodifundidos (detetor BSE) são utilizados para imagens de contraste de materiais. Um detetor na lente permite obter imagens de alta resolução com resoluções até à gama dos nm.
Além disso, a superfície da amostra pode ser processada in-situ a uma escala sub-µm utilizando um feixe de iões focalizado (FIB) para examinar a área imediatamente abaixo da superfície. Isto é utilizado, por exemplo, para analisar estruturas de camadas ou na análise de falhas. A obtenção de imagens da amostra utilizando um feixe de iões também permite a visualização da estrutura do grão em alto contraste.
Os SEM estão também equipados com modernos sistemas EDX para permitir a análise química da superfície examinada (ou na secção FIB). Questões mais complexas podem ser investigadas usando varreduras de linha, que mostram o curso de concentração de elementos selecionados.
Para examinar em pormenor a estrutura cristalina de um material, está disponível a difração por retrodispersão de electrões (EBSD). Com este método moderno, as microestruturas podem ser examinadas com elevada resolução lateral para determinar as seguintes caraterísticas: identificação de fases individuais, exame dos limites dos grãos, diferenças na orientação de grãos vizinhos, identificação de precipitados, etc.
- Metallography:
As investigações metalográficas servem para descrever a estrutura dos materiais qualitativa e quantitativamente, utilizando métodos microscópicos. Para as análises metalográficas, as secções transversais são preparadas utilizando procedimentos de preparação avançados (tais como mecânicos, electroquímicos, químicos). As microestruturas são então examinadas nestas secções transversais utilizando microscopia ótica ou microscopia eletrónica de varrimento e são determinadas caraterísticas como proporções de fase, tamanhos de grão, distribuição de tamanho de grão, tamanhos de partículas e precipitados. Isto permite-nos fornecer uma análise aprofundada dos materiais e possibilita uma análise de falhas e fracturas de alta qualidade.
- (Micro)Hardness measurements:
The hardness of metals, non-metals and coatings is determined by penetration tests: Hardness is defined as the resistance to penetration of a test specimen; the size of the permanent imprint of the test specimen serves as the measurement variable (Vickers, Knoop or Brinell method).
To determine the hardening depth, surface hardness depth and nitriding hardness depth of surface hardened steels, a series of hardness indentations are placed on the polished cross section from the sample edge towards the sample centre. The corresponding hardness depths are derived from the hardness-depth curve determined in this way.
Modern state-of-the-art equipment available at AAC enables the (fully automated) investigation of hardness with loads in the range of 0,25 g – 62,5 kg. Furthermore, harness mappings (e.g., line-scans, matrix-scans) can be performed to assess the lateral distribution of mechanical properties.

