CONSULTING

TESTING

DEVELOPMENT

RESEARCH
Startseite » Industry » Testing » Surface Analysis and Material Testing

All detailed information can be downloaded as PDF:

Surface Analysis and Material Testing

Precise analyis and tests

Material testing (including the determination of physical, chemical and mechanical properties) and in particular the analysis of surfaces are crucial components for assessing the quality and performance of materials and products. Our services at Aerospace and Advanced Composites GmbH can help ensure that materials meet the required standards and therefore offer the highest quality and performance.

What we offer at Aerospace and Advanced Composites:

Precise analyis and tests

Using high-quality analysis technologies and state-of-the-art equipment, we examine surface structures and materials in order to deduce statements about the quality or possible damage.

Professional competence

Our experienced and multidisciplinary team is ready to answer your questions. We not only deliver the required results, but also advise our customers on the development of components and the selection of materials to meet their respective requirements.

Customer-centric approach

Each customer’s request is treated individually taking into account any specific requirement. This ensures that we can offer our customers the best possible support.

Services at AAC – surface and material analysis

Metallography

Metallographic investigations serve to describe the structure of metallic materials qualitatively and quantitatively using microscopic methods. For metallographic analyses, cross-sections are prepared from metallic samples and etched if necessary. The microstructures are then examined on these cross sections using light microscopy or scanning electron microscopy and characteristics such as phase proportions, grain sizes, grain size distribution, particle sizes and precipitates are determined.

Damage analysis

The goal of a damage analysis is to determine the causes of a component’s failure systematically and thoroughly. Not only should an existing damage pattern be documented (depending on the type of damage, e.g. by light- and electron micrographs), but the aim is to understand the cause of the damage in detail to take appropriate measures to limit the damage, restore it and prevent it. Clarifying technical damage and its causes is an essential prerequisite for damage prevention. Damage analysis is therefore an indispensable part of learning from damage.

Light microscopy

With the help of various modern light microscopes (stereo and reflected light microscopy), surface structures can be displayed in detail. These include, among other things, the analysis of fracture surfaces, metallographic examinations, measurement of layer thicknesses in cross sections, and much more.

Scanning electron microscopy (SEM)

High-resolution imaging examinations of material samples and components are carried out using scanning electron microscopy (SEM). The use of different detectors provides different information about the structure of the surface being examined: the topography can best be imaged with secondary electrons (SE detector), while backscattered electrons (BSE detector) are used for material contrast images. An in-lens detector enables high-resolution images with resolutions down to the nm range.

Furthermore, the sample surface can be processed in-situ on a sub-µm scale using a focused ion beam (FIB) to examine the area immediately below the surface. This is used, for example, to analyse layer structures or in failure analysis. Imaging the sample using an ion beam also enables the grain structure to be displayed in high contrast.

The SEMs are also equipped with modern EDX systems to enable chemical analysis of the examined surface (or in the FIB section). More complex questions can be investigated using line scans, which show the concentration course for selected elements.

To examine the crystalline structure of a material in detail, electron backscatter diffraction (EBSD) is available. With this modern method, microstructures can be examined with high lateral resolution to determine the following characteristics: identification of individual phases, examination of grain boundaries, differences in orientation of neighbouring grains, identification of precipitates, etc.

Surface measurement

Surfaces are investigated using optical methods to determine the roughness, waviness and flatness of a surface. On the one hand, certain structures (e.g. peaks, valleys, grooves, pores, particle adhesions, etc.) can be measured and, on the other hand, the surface can be quantitatively characterized (determination of Ra, Rz and other statistical surface characteristics). The quantitative parameters are determined from 2D profile measurements and 3D surface measurements.

As an alternative to using purely optical methods, it is also possible to generate a digital surface model from SEM images using complex software programs and to derive the above-mentioned surface parameters from this model. This enables the assessment of waviness and roughness as well as the measurement of structures even on surfaces that are not accessible to optical inspection (e.g. miniature gearing of transmission parts).

Surface characterization

Knowledge of the surface energy and surface tension of materials is an important prerequisite for understanding and influencing interfacial phenomena in various scientific and industrial applications. This particularly includes issues in the areas of adhesion, coatings and material compatibility. Surface energy and surface tension are determined by the so-called contact angle measurement of a liquid drop. The surface energy of solids influences the wetting behaviour, adhesion and compatibility with other materials and plays an essential role in the development and evaluation of coatings and adhesives. The surface tension of liquids determines their spread and droplet formation and has a significant impact on processes such as emulsification and foam formation; It is used in inkjet printing.

Friction measurement

The determination of the coefficient of friction is carried out using a pin-on-disc tribometer as a model testing device: a test object (PIN, typically ball or rounded pin) is moved over a base body (DISC) with a defined normal force and the friction force is measured. The coefficient of friction µ is calculated from the ratio between frictional force and normal force. However, this is not a material property, but a characteristic parameter depending on the entire tribological system (both materials of pin and disc as well as lubricants). The setup at AAC allows tribological tests to be carried out under various environmental conditions: temperatures from -100 to +300°C, pressure from high vacuum to ambient pressure and various gas atmospheres can be used.

In addition to the tribological tests at the material level, the performance of components (e.g. gearboxes, slipring-assemblies etc.) can be examined in special test setups. Our broad portfolio of test methods enables us to address specific customer requirements.

In a post-test analysis, wear can be determined quantitatively after the tribological test. Tactile methods (measuring the depth of the friction mark) as well as electron microscopic methods (representation of wear, determination of material transfer, examination of the structure in the substrate material under the friction mark, etc.) are used.

Static ice shear adhesion (special test)

A quick and simple laboratory method for determining ice adhesion is important for the development of anti-ice coatings. The laboratory method developed by AAC uses a non-impact ice push test that can quickly determine the shear-force of ice adhesion to a coating in the range of 10 kPa to 1 MPa.

Hardness test

The hardness of metals, non-metals and coatings is determined by penetration tests: Hardness is defined as the resistance to penetration of a test specimen; the size of the permanent imprint of the test specimen serves as the measurement variable (Vickers, Knoop or Brinell method).

The hardness testing of small components and brittle materials and coatings requires the application of very low test-forces (microhardness testing).

To determine the hardening depth, surface hardness depth and nitriding hardness depth of surface hardened steels, a series of hardness indentations are placed on the polished cross section from the sample edge towards the sample centre. The corresponding hardness depths are derived from the hardness-depth curve determined in this way.

The modern hardness meter, which is available from AAC, enables hardness impressions and their measurement to be carried out fully automatically. A wide range of test loads (0.25g – 62.50kg) is available and hardness curves and hardness mappings (line or matrix measurements) can be carried out automatically.

Nanoindentation

As an extension to the classic hardness test, material parameters (such as hardness, elastic modulus, yield strength and material damping) can also be determined using penetration testing with very small forces (nanoindentation). The parameters are calculated from the force-distance curve measured during the test and from the impression determined in the course of the post-test examination.

Layer thickness measurement

Measuring the layer thickness is an essential component in the development of new layer systems and for analysing existing functional layers (e.g. in the course of damage analyses). The thickness of layer systems typically ranges from a few nanometres to a few micrometres. Depending on the type of coating, the substrate and the desired resolution, different methods are used:

In a destructive test, the sample is cross-cut and the micrograph is examined using light- and electron microscopic methods.

A minimally destructive method is measuring the layer thickness on an in-situ prepared FIB section: sample material is removed in a range of a few µm using a focused ion beam and the resulting cut surface is analysed. The area outside the FIB cut remains untouched.

Adhesion test

Adhesion testing is used to determine, on the one hand, the adhesion strength between the coating and the substrate and, on the other hand, the internal cohesion of a coating system (e.g. a multi-layer structure). For this purpose, cross-cutting tests and scratch hardness tests are carried out.

Young’s modulus and Poisson’s ratio

With the help of sound velocity measurements, the elastic modulus and the Poisson’s ratio can be determined non-destructively on the real component. This eliminates the need to produce special tensile samples and thus the problem of differing properties between the real component and the test specimen.

Mechanical testing

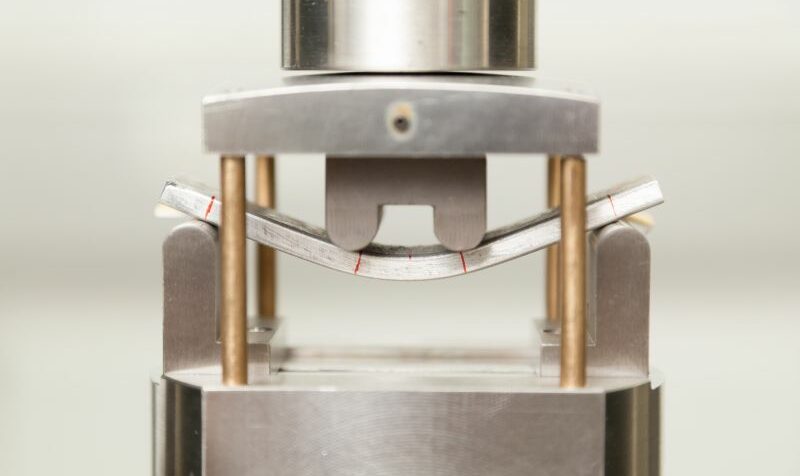
Material properties under various and environmental conditions are of great importance to reliably design, manufacture and operate components and structures. AAC’s extensive testing facilities, such as: static tensile, compression, bending and shear tests, supplemented by dynamic test methods (e.g. impact, fatigue, fracture toughness and fatigue crack growth), provide these important material properties. We offer not only standardized mechanical tests, but also customized test solutions under extreme conditions, such as: B. cryogenic tests from 4.2 K to high temperature tests up to 2600 °C, on various material classes such as metals, polymers, composites, and ceramics. The mechanical testing of structural components completes our portfolio and enables us to establish a direct connection between material properties and structural performance.

Chemical Analysis

Energy-dispersive X-ray spectroscopy (EDX, as part of the electron microscope) and infrared spectroscopy (IR) are used as methods to determine chemical compositions. The results can also be used to make statements about the origin of the damage in the frame of a damage analysis (e.g. examining material transfer in tribological systems or analysing corrosion processes).

Density determination

Determining the density of liquids is necessary for product quality and regulatory compliance in many industries. Density measurements enable precise control of recipes and processes and ensure product consistency and performance.

Thermal analysis

To analyse the behaviour and properties of materials under different temperature conditions, thermal analysis must be carried out at material level. The following methods are available:

Differential Scanning Calorimetry (DSC) measures the flow of heat into or out of a sample while it is subjected to controlled temperature changes. It provides essential insights into material properties such as glass transition temperatures and crystallinity as well as information about phase transitions, melting points and reaction kinetics.

Thermogravimetric Analysis (TGA) allows the determination of thermal decomposition, weight loss and thermal stability as a function of temperature.

The outgassing behaviour of a material represents a special case of thermal analysis: In the standard test (according to the ECSS standard), the mass loss of a material is determined under the influence of vacuum and elevated temperature. More specific assessment of the outgassing behaviour (including residual gas analysis and chemical determination of the outgassing species) can be obtained in an alternative setup (“Advanced Outgassing Test”) featuring an in-situ weight assessment during increasing the temperature. This test method enables a deeper understanding of the underlying processes and allows an assessment of long-term behaviour.

Dynamic light scattering

Dynamic light scattering (DLS) is intended to provide important insights into particle size distribution and stability in various solutions. It plays a critical role in quality control, research, and development in various industries, helping to advance technologies and improve products and processes.

Weathering test

The aim is to evaluate the performance of coatings and components under accelerated conditions. The portfolio at AAC includes:

  • Weathering tests: simulation of sunlight, rain and dew.
  • Xenon test: Simulation of damage caused by full spectrum sunlight.
  • Pressure vessel test (autoclave): Evaluation of material resistance under extreme temperatures and humidity.
  • Temperature Stability Testing: Evaluation of materials, components, and devices at elevated temperatures.
  • Thermal cycling tests: Simulation of extreme temperature fluctuations to examine the effects on products, materials, components and devices.
  • Accelerated aging testing: Simulating conditions that accelerate the aging process to predict the long-term durability of products and components.
  • Moisture Stability Testing: Evaluate materials under various moisture levels to ensure long-term reliability.

This is how we approach your project

Our team will analyze your situation and recommend a suitable procedure